

After Effects Import Photoshop Layers
Create liquid effects in Photoshop
In this tutorial you will learn how to create interesting, fluid elements using the Liquify filter. Using just a single image, you can create a whole variety of effects by pushing, pulling, rotating, reflecting, puckering and bloating any area as subtly or drastically as you wish.
The process used here is extremely random, so you'll be able to achieve surprising new results each time you use the command, making it ideal for abstract experiments.

01 Start by opening the bird.png file provided in the support files, or select a bird image of your choice. Place it on a new Photoshop document with a white background.

02 Duplicate the layer and hide the original, select the duplicated layer, go to Filter>Liquify and select the Mirror tool (M). With a big brush, click-and-drag on the inner sides of the bird: the objective here is to open holes in it. To do this, make circular movements with your mouse, while at the same time preserving the top area. It's all about experimenting.
03 Duplicate the layer and go to the Liquify dialog again. Now, with a bigger brush and using the Mirror tool, we want to create some liquid effects. Use the Push Left tool (O) and make clockwise movements to drag the image. You can also experiment with the Mirror tool by making clockwise movements with a smaller-sized brush.
04 Now that you have some elements, start making a composition. Duplicate the last layer a few times and place it in different positions. Remember that we want a fluid look, so it's important to place the duplicated layers in a way that gives a sense of movement to the composition.

05 Duplicate the layer from step 02 and go to the Liquify dialog. Select the Bloat tool (B) and, with a brush that's a little bigger than the bird's beak, place the cursor on the yellow area and drag in an anticlockwise direction until the area stops expanding. Now select the Mirror tool and make anticlockwise movements to create a fluid look. Keep experimenting with clockwise and anticlockwise movements.
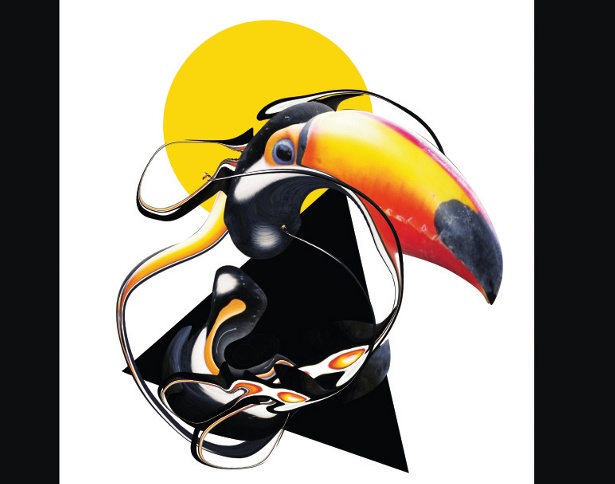
06 Move the image around until you're happy with the result. Erase any unnecessary areas and create some background shapes – I went for a black triangle and a yellow circle here.
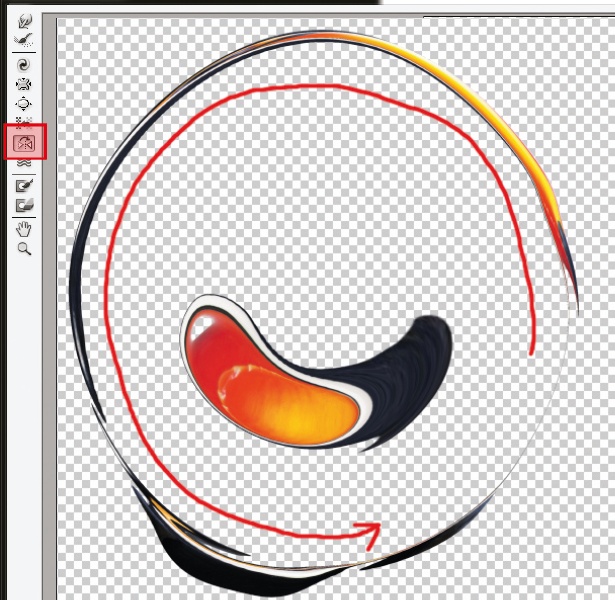
07 Duplicate the layer from step 02 and repeat the process – this time we want a circular thin element. Use a relatively big brush and click-and-drag on the empty areas, making anticlockwise movements. Keep doing this until you have a circular shape.
Current page: Page 1
Next Page Page 2
Related articles
After Effects Import Photoshop Layers
Source: https://www.creativebloq.com/computer-arts/create-liquid-effects-photoshop-2128237
Posted by: cooktheartumety.blogspot.com
0 Response to "After Effects Import Photoshop Layers"
Post a Comment